Student ID: SLAE64-1611

Assignment Five: Analysis of Shellcode Part Three of Three - linux/x64/exec

This blog post has been created for completing the requirements of the SecurityTube Linux Assembly Expert 64 Certification:
https://www.pentesteracademy.com/course?id=7

All code can be found in: https://github.com/securitychops/security-tube-slae64

All work was tested on a 64bit version of Ubuntu 18.04.1 LTS
If you have not already read my post from the x86 version of the SLAE (Analysis of Shellcode Part Three of Three - linux/x86/exec) then I would highly encourage you to do so before continuing forward since having a good understand of that topic will help quite a bit for the following analysis…
Assignment five of the SLAE64 we were asked to perform a thorough analysis of three separate Linux/x64 shellcode payloads of our choosing from msfvenom using gdb, this is part three of three, linux/x64/exec …
The Payload
In order to start our analysis we need to first generate our shellcode to perform our thorough gdb analysis on!
msfvenom -p linux/x64/exec -f c cmd=id
Which produced the following output:
No platform was selected, choosing Msf::Module::Platform::Linux from the payload
No Arch selected, selecting Arch: x64 from the payload
No encoder or badchars specified, outputting raw payload
Payload size: 42 bytes
Final size of c file: 201 bytes
unsigned char buf[] =
"\x6a\x3b\x58\x99\x48\xbb\x2f\x62\x69\x6e\x2f\x73\x68\x00\x53"
"\x48\x89\xe7\x68\x2d\x63\x00\x00\x48\x89\xe6\x52\xe8\x03\x00"
"\x00\x00\x69\x64\x00\x56\x57\x48\x89\xe6\x0f\x05";
The Proof of Concept
Just like in Analysis of Shellcode Part One of Three - linux/x64/shell_bind_tcp we are being explicitly asked to perform our analysis with gdb. And once again, in order to better accommodate that I went ahead and moved the shellcode into our sample program, which we can then launch with gdb, step into and then perform our analysis.
Our proof of concept C program
#include<stdio.h>
#include<string.h>

//compile with: gcc exec.c -o exec -fno-stack-protector -z execstack

//msfvenom -p linux/x64/exec CMD=id -f c
const unsigned char payload[] = \
"\x6a\x3b\x58\x99\x48\xbb\x2f\x62\x69\x6e\x2f\x73\x68\x00\x53"
"\x48\x89\xe7\x68\x2d\x63\x00\x00\x48\x89\xe6\x52\xe8\x03\x00"
"\x00\x00\x69\x64\x00\x56\x57\x48\x89\xe6\x0f\x05";

main()
{
    printf("Payload Shellcode Length:  %zu\n", strlen(payload));

    int (*ret)() = (int(*)())payload;
    ret();
}
Next up we compile with gcc
gcc exec.c -o exec -fno-stack-protector -z execstack
GDB
Now we can finally launch our executable with gdb!
gdb ./exec -tui
After we are running in gdb we will need to set a break point on main and then step into the call which will execute our shellcode. After doing that we will be able to see our shellcode within the debugger!
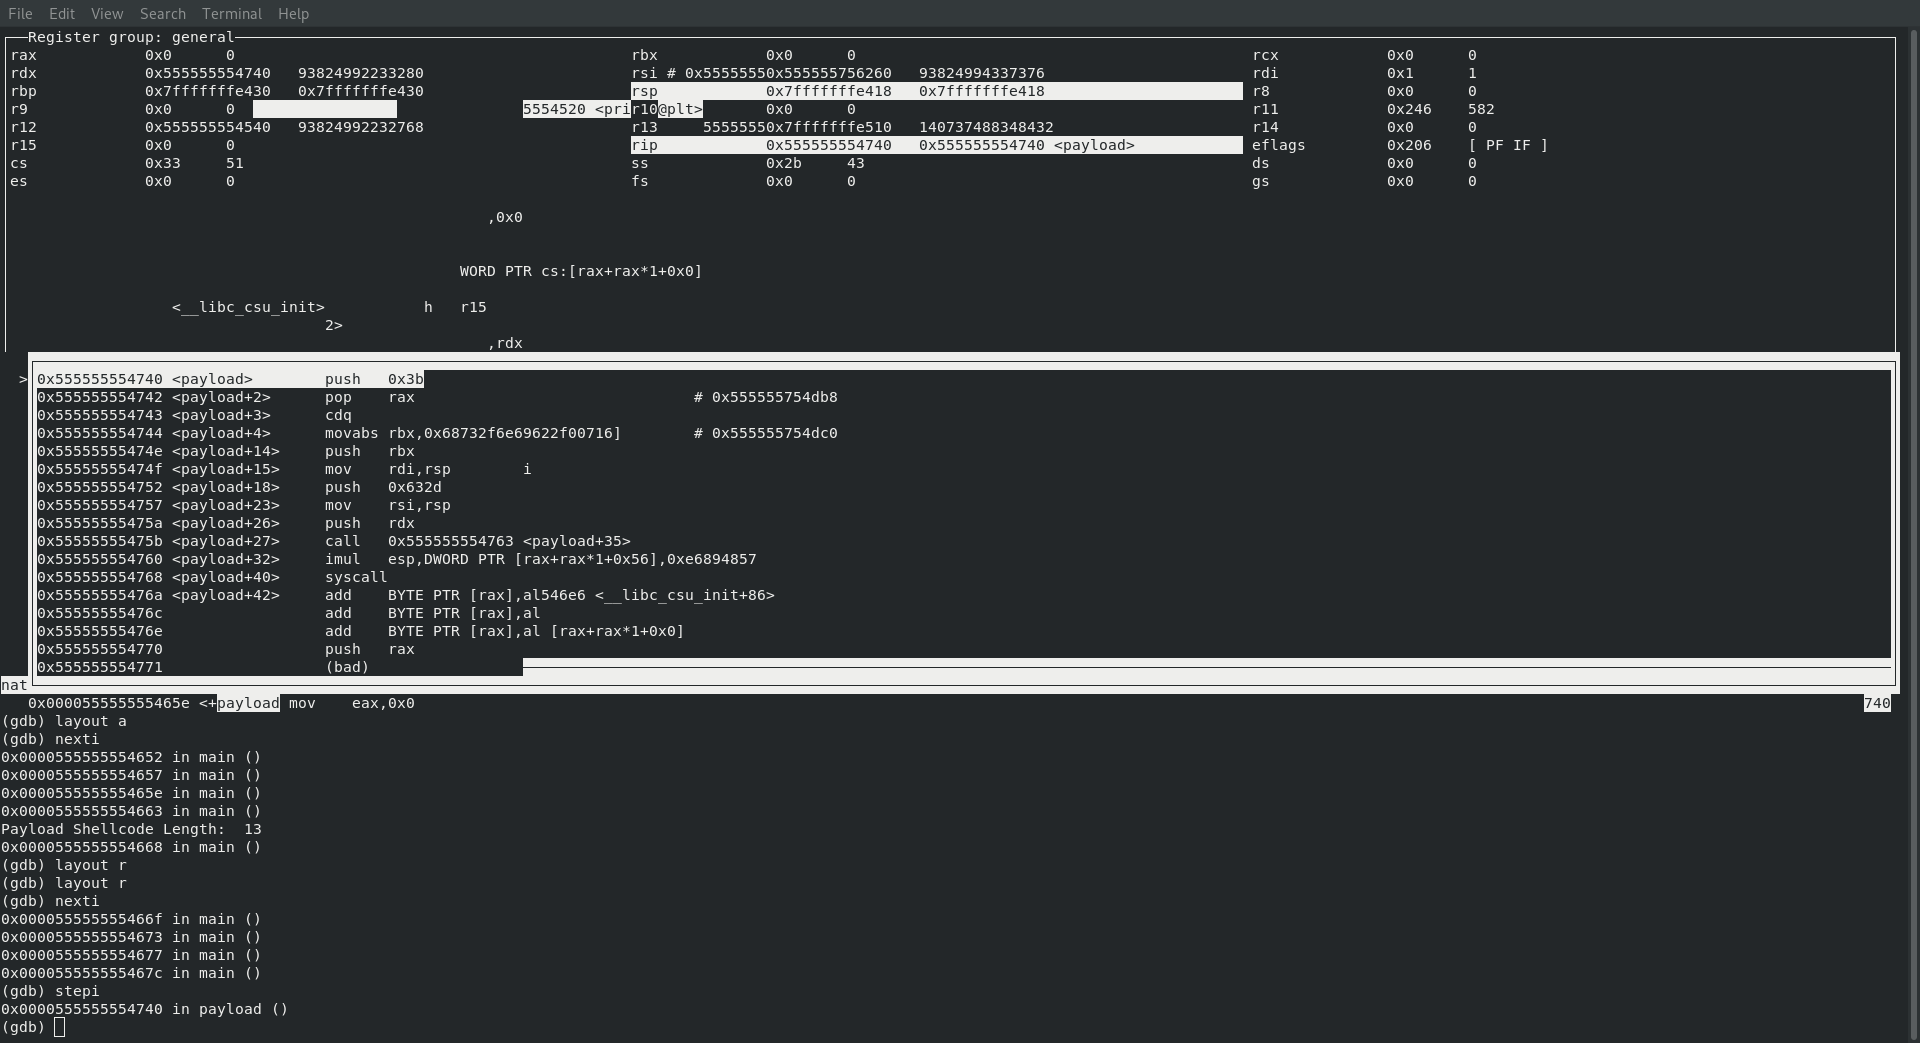
At this point I turned on the register and assembly view within gdb by entering the following commands
layout a
layout r
SYS_EXECVE
Oh snap, since we are executing the command id it looks like we are jumping directly to executing sys_execve!
As a quick reminder, here is what a call to sys_execve would look like
    ; rax : sys_execve 59
    ; rdi : const char *filename
    ; rsi : const char *const argv[]
    ; rdx : const char *const envp[]
Ok, let’s start by taking a look at their disassembled assembly code within gdb:
the disassembly
   │0x555555554740 <payload>        push   0x3b
   │0x555555554742 <payload+2>      pop    rax
   │0x555555554743 <payload+3>      cdq
   │0x555555554744 <payload+4>      movabs rbx,0x68732f6e69622f00716
   │0x55555555474e <payload+14>     push   rbx
   │0x55555555474f <payload+15>     mov    rdi,rsp
   │0x555555554752 <payload+18>     push   0x632d
   │0x555555554757 <payload+23>     mov    rsi,rsp
   │0x55555555475a <payload+26>     push   rdx
   │0x55555555475b <payload+27>     call   0x555555554763 <payload+35>
   │0x555555554760 <payload+32>     imul   esp,DWORD PTR [rax+rax*1+0x56],0xe6894857
   │0x555555554768 <payload+40>     syscall
Right off the bat we can see that we are loading 0x3b (59) into the rax register, so sure enough … it is definitely going to be a sys_execve call!
However, there are certainly a few different instructions in here than when we were just executing /bin/sh … one of which is something called cdq
│0x555555554743 <payload+3> cdq
This is an interesting one, currently we have 0x0000000000000059 being stored in rax (which is as positive number) so when we call cdq it will evaluate rax and copy the sign bit into every bit position in the rdx register. This is a pretty creative way of putting a null value into rax while still avoiding moving an actual null from the assembly code itself.
https://www.felixcloutier.com/x86/cwd:cdq:cqo
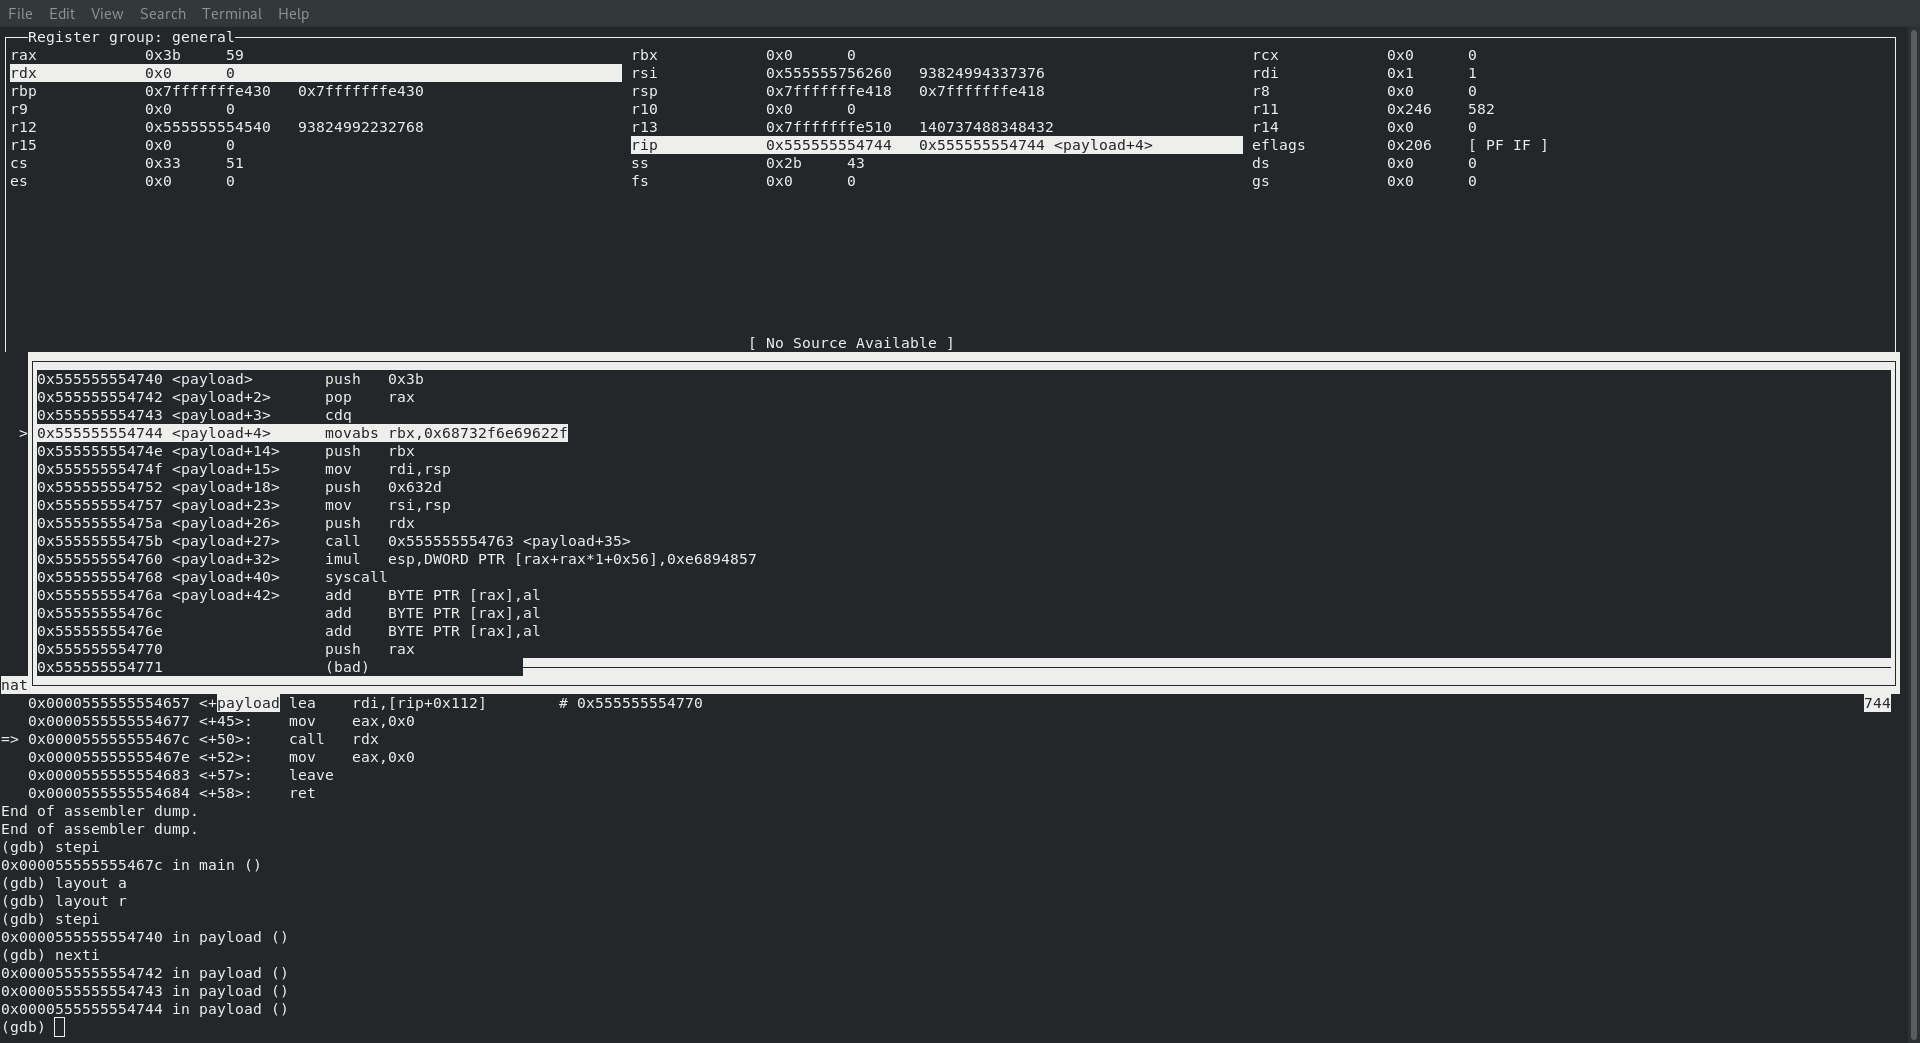
So next up we would expect to see the code putting /bin/sh into rdi and rsi somehow … let’s take a look!
   │0x555555554744 <payload+4>      movabs rbx,0x68732f6e69622f00716
   │0x55555555474e <payload+14>     push   rbx
   │0x55555555474f <payload+15>     mov    rdi,rsp
Awww yeah, look at that … if we convert 0x68732f6e69622f00716 from hex to ascii we end up getting hs/nib/ which is then immediately moved (push/pop) into rdi. Right after that we push and pop 0x632d into rsi which ends up being a c-. Ok, let’s take a moment and think about this … we have /bin/sh in rdi, which represents our filename and -c in rsi which is our argv … so at the moment we have /bin/sh -c stored and ready for execution!
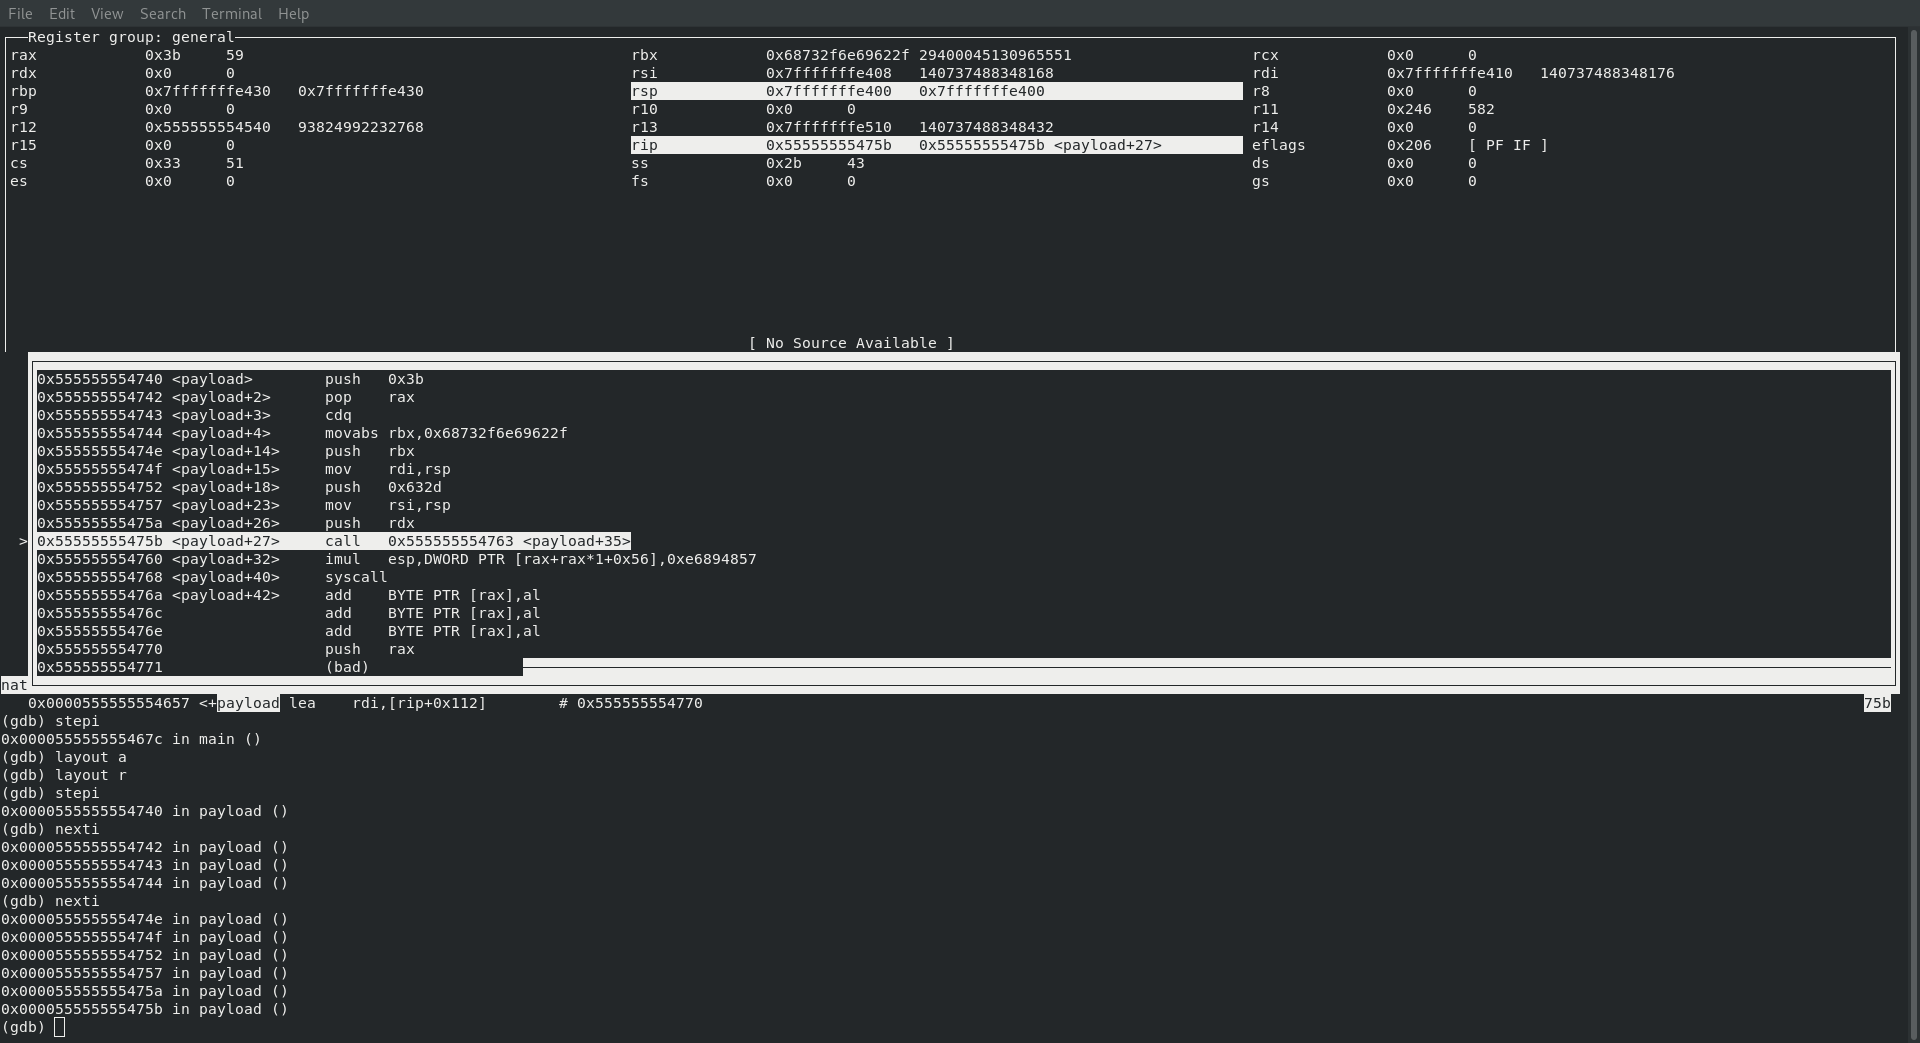
But what about our command id I hear you asking … and what a good question it is … let’s take a look
The next instruction we land on looks a little confusing since we appear to making a call to the address 0x555555554763 which will land us directly in the middle of the following instruction set:
│0x555555554760 <payload+32> imul esp,DWORD PTR [rax+rax*1+0x56],0xe6894857
Let’s fall back and take a look at our original shell code mixed with the call and see if we can’t make heads or tails of this all because we appear to have some shenanigans afoot here …
"\x6a\x3b\x58\x99\x48\xbb\x2f\x62\x69\x6e\x2f\x73\x68\x00\x53"
"\x48\x89\xe7\x68\x2d\x63\x00\x00\x48\x89\xe6\x52\xe8\x03\x00"
"\x00\x00\x69\x64\x00\x56\x57\x48\x89\xe6\x0f\x05"
Which at first glance appears to disassembly to:
0:  6a 3b                   push   0x3b
2:  58                      pop    rax
3:  99                      cdq
4:  48 bb 2f 62 69 6e 2f    movabs rbx,0x68732f6e69622f
b:  73 68 00
e:  53                      push   rbx
f:  48 89 e7                mov    rdi,rsp
12: 68 2d 63 00 00          push   0x632d
17: 48 89 e6                mov    rsi,rsp
1a: 52                      push   rdx
1b: e8 03 00 00 00          call   0x23
20: 69 64 00 56 57 48 89    imul   esp,DWORD PTR [rax+rax*1+0x56],0xe6894857
27: e6
28: 0f 05                   syscall
https://defuse.ca/online-x86-assembler.htm#disassembly2
This makes it a good bit easier to see what is going on, we have a call which is jumping to address 0x23 (0x55555555475b <payload+27> call 0x555555554763 <payload+35> in the code in gdb), so we have a set of instructions which were disassembled incorrectly due to the shellcode likely being a little atypical in the way it has been written … but that is ok, because since we now know where the jump is going we can see what is actually happening …
So again, in our web based disassembly version:
1b: e8 03 00 00 00          call   0x23
20: 69 64 00 56 57 48 89    imul   esp,DWORD PTR [rax+rax*1+0x56],0xe6894857
27: e6
We now know we are really calling 0x23 which takes us to 56 57 48 89 e6 which disassembles to:
0:  56                      push   rsi
1:  57                      push   rdi
2:  48 89 e6                mov    rsi,rsp
Ok, this look waaaaaaay better now … do you see it? If not then let me put things back together a little more clearly:
This is really what the code that is executing is really doing:
0:  6a 3b                   push   0x3b
2:  58                      pop    rax
3:  99                      cdq
4:  48 bb 2f 62 69 6e 2f    movabs rbx,0x68732f6e69622f
b:  73 68 00
e:  53                      push   rbx
f:  48 89 e7                mov    rdi,rsp
12: 68 2d 63 00 00          push   0x632d
17: 48 89 e6                mov    rsi,rsp
1a: 52                      push   rdx
1b: e8 03 00 00 00          call   0x23
20: 69 64 00
23: 56                      push rsi
24: 57                      push rdi
25: 48 89 e6                mov rsi, rsp
27: 0f 05                   syscall
So where were we … we have /bin/sh in rdi, which represents our filename and -c in rsi which is our argv … so at the moment we have /bin/sh -c stored and ready for execution!
Next up we see the following commands
12: 68 2d 63 00 00          push   0x632d
17: 48 89 e6                mov    rsi,rsp
So now rsi looks like di c- which is immediately followed by pushing rdx (which is already null) so really we end up with \0di c- in rsi!
All that is left is to make sure everything is in the correct register …
23: 56                      push rsi
24: 57                      push rdi
25: 48 89 e6                mov rsi, rsp
27: 0f 05                   syscall
So we end up pushing rsi followed immediately by rdi, which ends up being \0di c- hs/nib/, so once that is moved back to rsi we have a final set of registers of
    ; rax : 59
    ; rdi : /bin/sh\0
    ; rsi : /bin/sh -c id\0
    ; rdx : null
Which means we should indeed end up executing id in our proof of concept shellcode!